Gerald McAlister | RGB Haptics | Beginner


Gerald McAlister | RGB Haptics | Beginner
This tutorial covers how to use RGB Haptics to add detailed haptics based on raw waveforms. We’ll go over the basic settings you can utilize and how to import and export haptic waveforms. An example of this is included in the RGB Haptics asset in the scene called “Basic Waveform Haptics”.
As we covered in the setup tutorial, the ContinuousHaptics script is the simplest way to play a haptic out of a controller when you touch an object. It is helpful for playing any haptics that need to be played from an object continuously. Other scripts can also be used to play haptics however, such as the the CollisionHaptics script. The important detail to note is that each of these scripts can utilize one of two types of haptics currently: Waveform or Audio. Since this tutorial covers Waveform Haptics, we will focus on the Waveform option, but the important note is that any haptic script can use a waveform as a source.
Haptic waveforms, can best be thought of as a graph of the frequencies to play over time. When you draw out these waveforms in the waveform editor, you’ll do so from a purely mathematical perspective. This means that your graph will be much smoother than what is necessarily played out of the controllers. This is because RGB Haptics has to sample the waveform at the rate that the controllers can support for playback for buffered haptics (or at the framerate of the game or application for non-buffered haptics). They can still be synchronized with an AudioSource, but you will want to ensure they are the same length, otherwise you may run into issues with playback.
Let’s go ahead and start with a very simple setup: create an empty scene with nothing more than a VR player and plane. We cover how to set this up in a tutorial on our website. Also ensure that you have attached the XRNodeHaptics script to each hand, setting them up appropriately as detailed in our setup tutorial. Now let’s go ahead and add a ContinuousHaptics component to the cube and enable “Play On Awake” for it.
By default, “Waveform” will be the default clip type. You’ll see some default settings that look something like this:
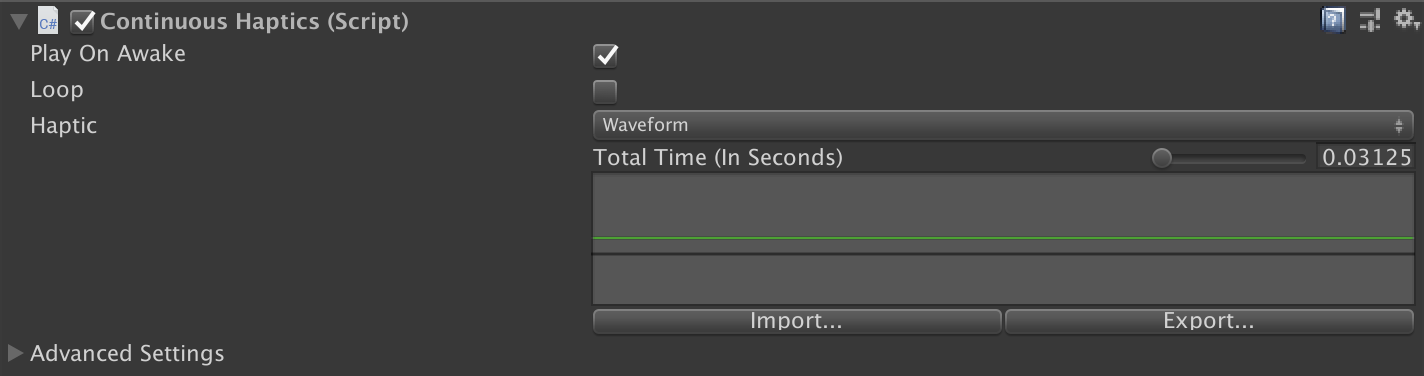 The ContinuousHaptics default settings should look like this.
There are two main components to waveform haptics: The “Total Time” and the “Curve Over Frames”. The “Total Time” is the length of the wavaeform haptic clip, and is measured in seconds, while the “Curve Over Frames” is the actual waveform itself. The waveform is drawn on a graph going from 0.0 - 1.0 on both the X and Y axis. On the X axis, we have the time of the clip, meaning that a value of 1.0 on this axis represents the last time available in the length of the clip. The Y axis is the value for the frequency at that point in time, with 0.0 being no haptis and 1.0 being the maximum intensity.
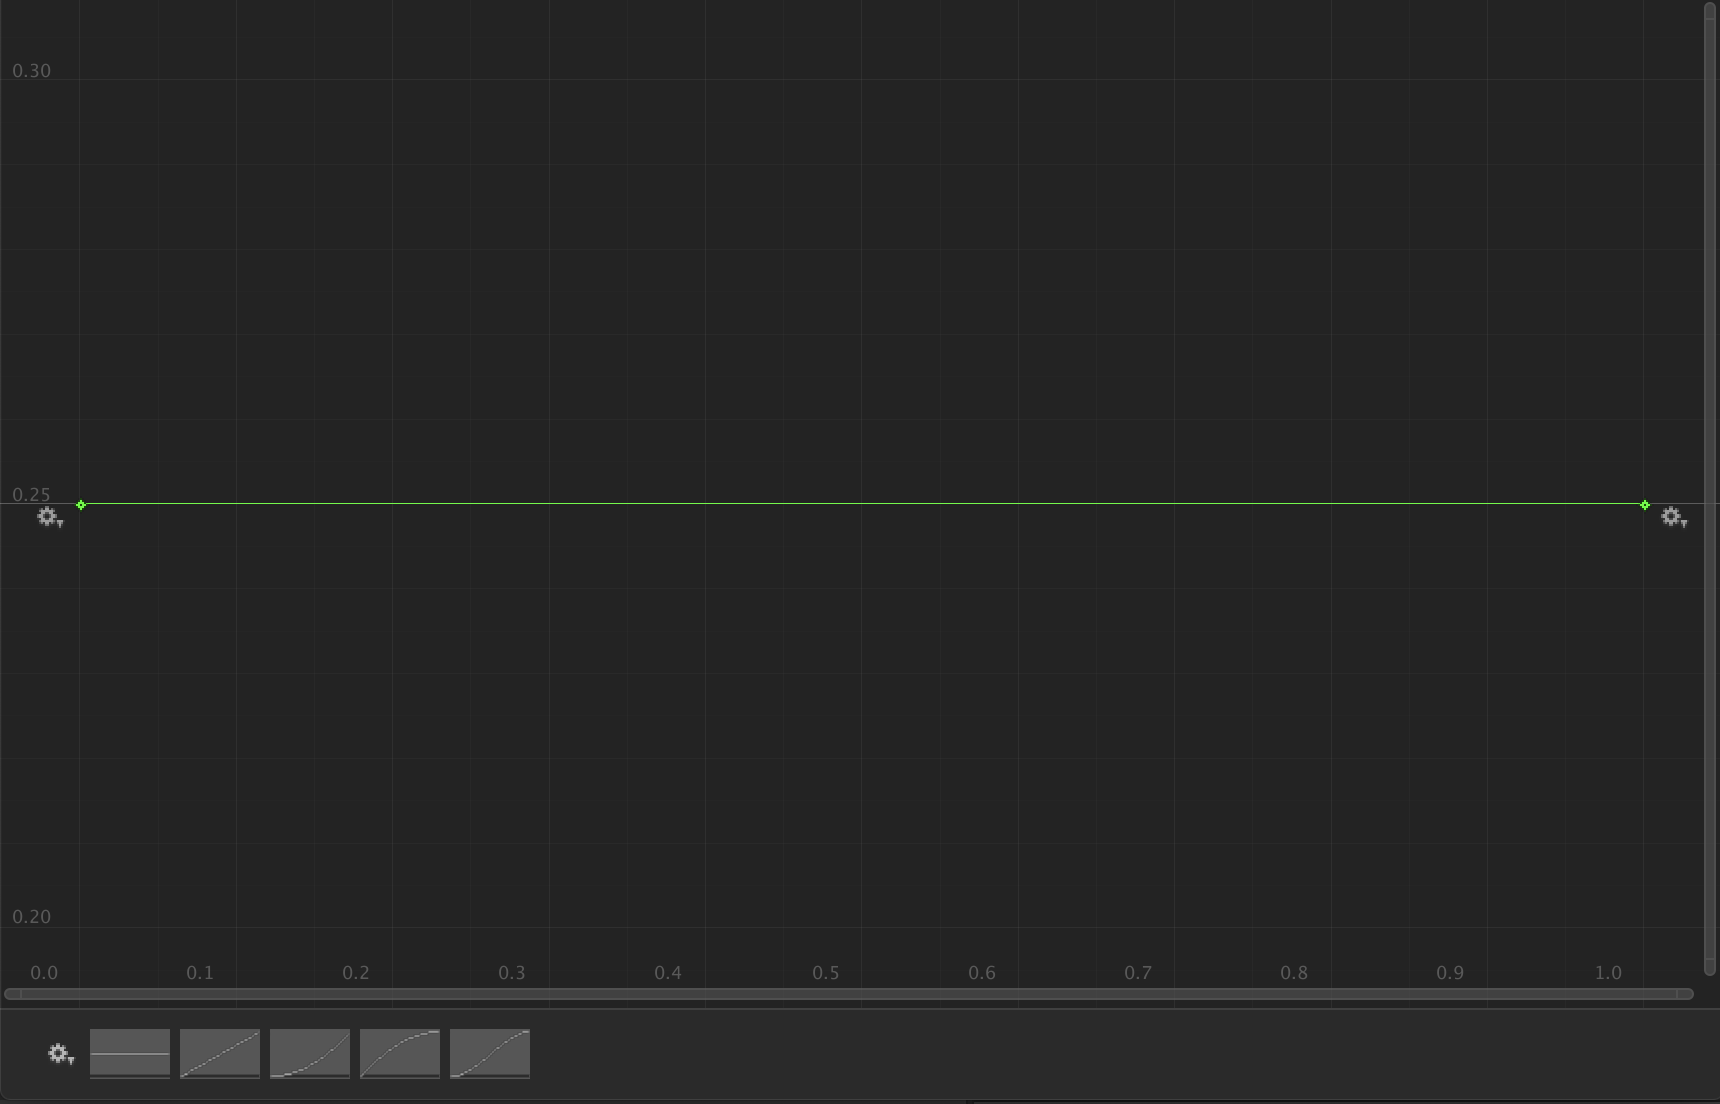 The default graph for “Raw” haptics.
The default “Total Time” value is set to 0.03125, which is best used for brief collisions, such as those that occur during a collision haptic. This time is very brief, and results in the user feeling a “tap” effect. Raw haptics support a maximum total time of 10 seconds, in order to prevent the controllers from running into issues with their motors running for too long. At the bottom of the graph window, you will see some default curves that you can use for a waveform. Go ahead and click on any of those, then set the total time to 5 seconds. Your settings should loko somoething like this:
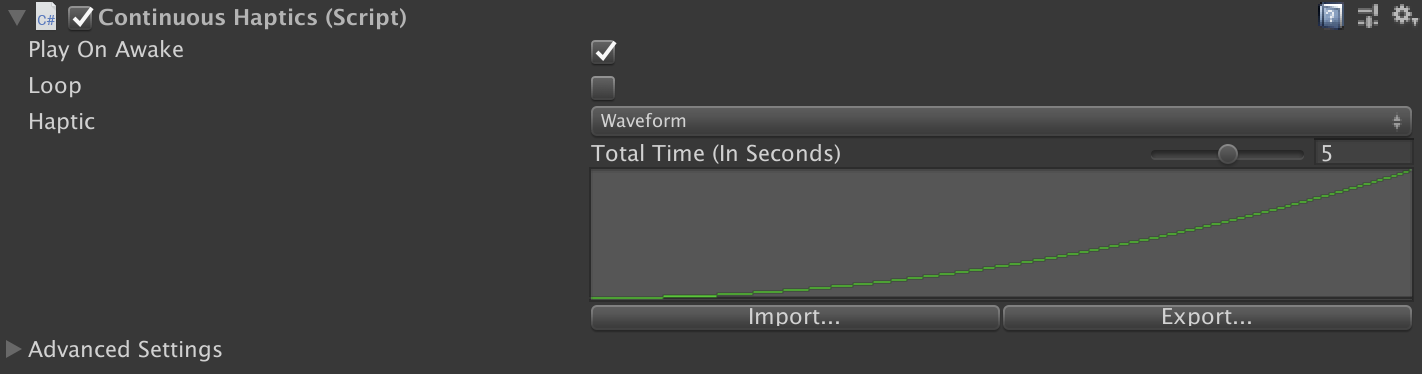 The settings for the waveform haptics we’ll use.
Go ahead and play this scene, and you should feel the haptics slowly ramp up over a time of 5 seconds, before turning off, but only when touching the cube. You can enable looping by toggling the “Loop” checkbox. This sample scene is included in the scene titled “Basic Waveform Haptics”.
Import and exporting waveforms is incredibly simple: To export, simply click the “Export” button on the waveform haptic clip, and choose where you want to save it. The default folder will be in your assets folder, though you can of course choose anywhere to save it. Similarly, you can import a waveform haptic clip from anywhere as well by clicking the “Import” button. When you do this, you can even undo this action by pressing undo like you would normally. This is because once it is loaded into the haptic clip, the file is no longer needed! This means that if you are reusing haptic waveforms from another project, you don’t need to import the files themselves into the project, you only need to import them into the component you are updating them.