Gerald McAlister | RGB Haptics | Intermmediate


Gerald McAlister | RGB Haptics | Intermmediate
This tutorial covers how to use RGB Haptics to add Relative Haptics that occur based on collisions. We’ll be creating a simple scene where some balls will fall onto a table, and if you touch the table, you will feel the collisions from the balls. An example of this is included in the RGB Haptics asset in the scene called “Collision Haptics”.
To begin, we need to setup a simple scene. We’ll go ahead and create our simple player object like in our setup, having just a simiple plane for the ground and no floating cube. Then, for each hand, we’ll want to an XRNodeHaptics component, ensuring the proper Device Node is selected for each hand. We’ll be using relative haptics to handle all of the collision haptics, as we want the player to only feel these haptics when they are touching one of the objects that has a collision occuring.
Next, we’ll want to setup our table object, as well as our balls and their spawner. We’ll want the balls to roll onto the table, and then disappear after a bit, only to reappear on a ramp. Our setup will look something like this:
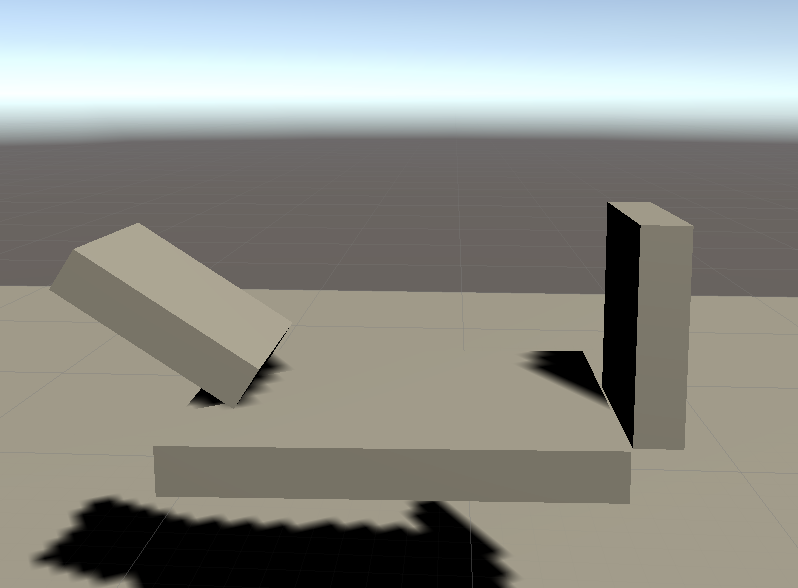 A simple ramp with a “table” that each ball will fall onto.
The wall at the end of the table will prevent the balls from falling off. Now we just need two small scripts. The first will spawn all of our balls:
using UnityEngine;

public class BallSpawner : MonoBehaviour
{
    public GameObject BallPrefab;
    public float SpawnTime = 2.0f;

    private float mStartTime;

    // Start is called before the first frame update
    void Start()
    {
        mStartTime = Time.time;
    }

    // Update is called once per frame
    void Update()
    {
        if (Time.time - mStartTime >= SpawnTime)
        {
            Instantiate(BallPrefab, transform.position, transform.rotation);
            mStartTime = Time.time;
        }
    }
}
This second one will handle our balls’ lifecycles:
using UnityEngine;

public class BallObject : MonoBehaviour
{
    public float DeathTime = 5.0f;

    private float mStartTime;

    // Start is called before the first frame update
    void Start()
    {
        mStartTime = Time.time;
    }

    // Update is called once per frame
    void Update()
    {
        if (Time.time - mStartTime > DeathTime)
        {
            Destroy(gameObject);
        }
    }
}
Pretty simple scripts! Feel free to adjust the times of each as you see fit, but for this tutorial we’ll stick with the defaults. You can attach the BallSpawner script to an empty game object somewhere above the ramp, and then create a sphere GameObject to attach the BallObject script to. Don’t forget to add a RigidBody to the ball as well, to make sure that it falls onto the table! At this point, run your scene, and make sure that you can look and move around, see your hands, and that the balls spawn, roll onto the table, and then are destroyed shortly thereafter.
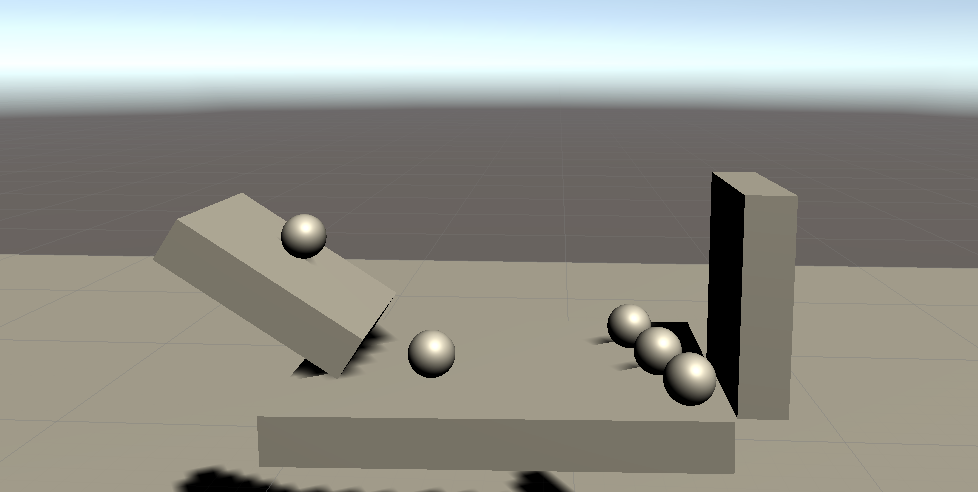 The balls should roll onto the table, and should spawn faster then they disappear.
At this point, we’re ready to begin adding in our haptics! We need a way to turn each object into a haptic node, so that it can transfer its haptic effects along to each other as collisions occur. RGB Haptics includes just the script for that: The CollisionHaptics script! Go ahead and add this script to the Ramp, Table, and Wall objects. This will ensure that they can properly receive the collision haptics from the ball. Then, for our ball prefab, go ahead and also add the CollisionHaptics script to that as well. You’ll want to make sure that the ball has the desired haptic effect for itself, and that any tables have their desired effects too!
At this point, you should now be able to feel the balls hitting the table as they fall. We recommend using a small Total Time of 0.03125 seconds, as this will ensure that additional collision effects don’t overlap improperly.
There’s one main advanced setting available at the moment: The Transfer Immediate option. When enabled, this will send the entire haptic effect to the controller all at once, so that if the player moves their hand away from the object, they will still feel the effect. This can be helpful if the haptic effect used is longer then how long the player may be touching the object. For example, when hitting a shield with a sword, the reverberation may need to be extended using this option.