Gerald McAlister | RGB Haptics | Beginner


Gerald McAlister | RGB Haptics | Beginner
Absolute haptics allow you to play a haptic effect on any device, regardless of how close to the haptic source it is. This tutorial covers how to use absolute haptics to do this, and somoe of the more advanced capabilities that come with this. An example of this is included in the RGB Haptics asset in the scene called “Absolute Haptics”.
Let’s start by creating a very simple cube scene, just like in our setup tutorial. Instead of adding any haptics to our hands or the cube however, let’s only add an AbsoluteHaptics script to our cube GameObject. When you do so, you’ll see a few default settings.
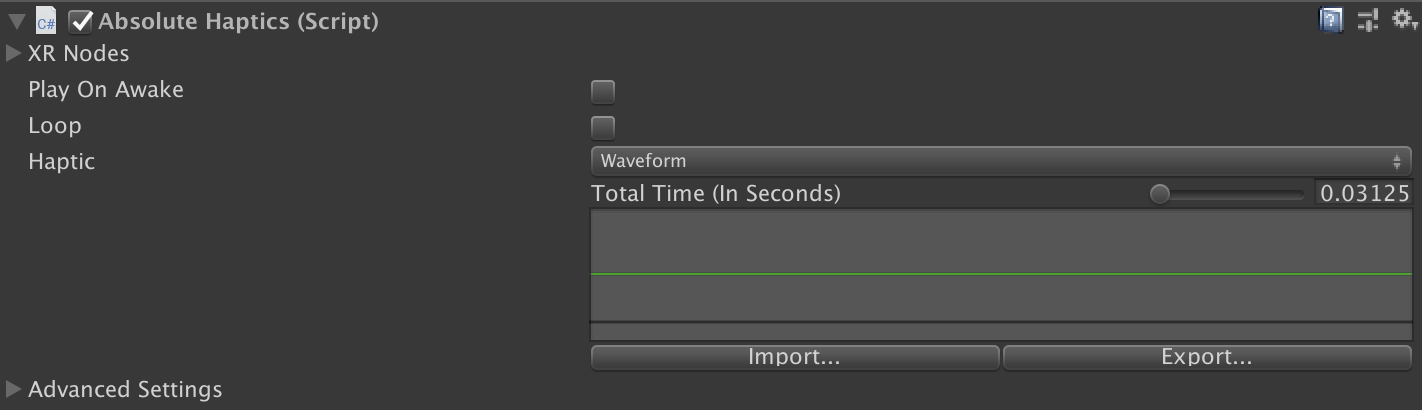 The default settings should look like this.
The first parameter you’ll notice is the XRNodes. If you expand this, you’ll notice that there are no XRNodes. Let’s go ahead and add 2, setting them to the Left Hand and Right Hand specifically. Next, toggle Play On Awake and Loop to both be enabled. This will ensure it plays when the scene starts and continues playing. Finally, setup a waveform that gradually grows and shrinks, with a Total Time of 10 seconds.
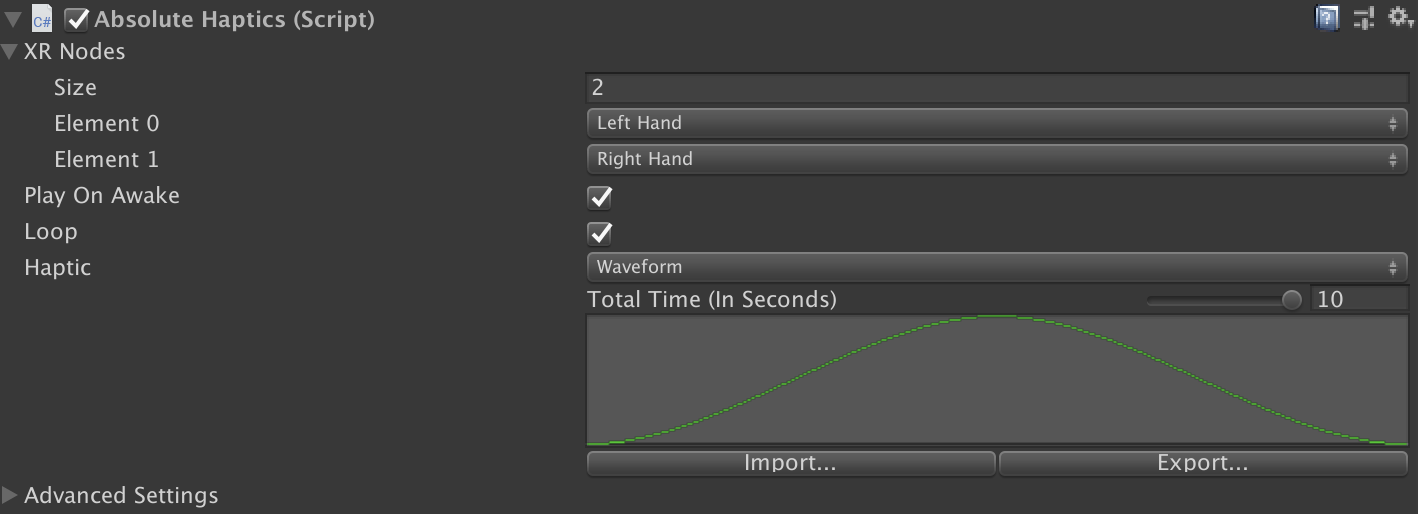 The new settings should look like this.
Go ahead and test this scene out and you should feel both controllers continue to vibrate, starting out with small vibrations, growing, then shrinking again. Your hands do not need to be anywhere near the cube in order to feel these haptics!
With the simple waveform, there’s not a whole lot to it. You can also switch this to come from an audio file, synchronizing it with an AudioSource via the advanced settings. Absolute haptics also include methods to play, pause, and stop haptics, allowing you to treat them very similar to an audio source. You can also extend this class in order to create custom triggers for this as well. For example, to play when an object enters a trigger collision and stops when it exits, you could create the following script:
using UnityEngine;
using RGBSchemes;

public class AbsoluteCollisionHaptics : AbsoluteHaptics
{
    private void OnTriggerEnter(Collider other)
    {
        Play();
    }

    private void OnTriggerExit(Collider other)
    {
        Stop();
    }
}
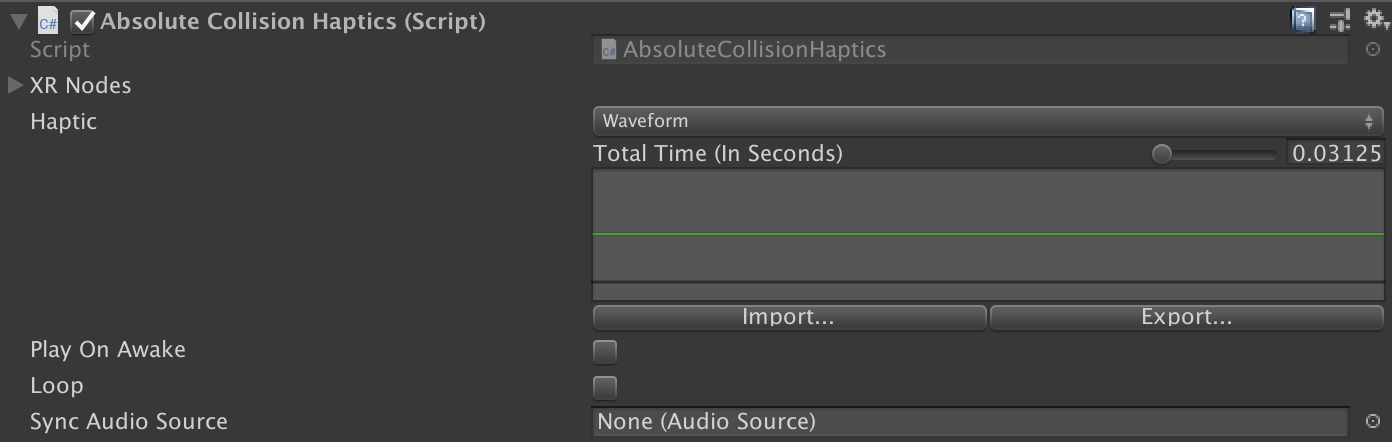
This is included in the Demos folder as a script called AbsoluteCollisionHaptics. This makes it very easy to add generic haptics anywhere in your scene, and is highly extendable. One thing to note is that your inputs will look slightly different this is an extended script.
 The default look for an extended script.
If you decide to write an editor extension however, this is relatively easy. As an example, you can do so to match what the AbsoluteHaptics looks like via the following script (not included):
#if UNITY_EDITOR
using UnityEditor;

[CustomEditor(typeof(AbsoluteCollisionHaptics))]
[CanEditMultipleObjects]
public class AbsoluteCollisionHapticsEditor : Editor
{
    SerializedProperty XRNodes, Haptic, PlayOnAwake, Loop, SyncAudioSource;
    protected static bool AdvancedSettings;

    private void OnEnable()
    {
        XRNodes = serializedObject.FindProperty("XRNodes");
        Haptic = serializedObject.FindProperty("Haptic");
        PlayOnAwake = serializedObject.FindProperty("PlayOnAwake");
        Loop = serializedObject.FindProperty("Loop");
        SyncAudioSource = serializedObject.FindProperty("SyncAudioSource");
    }

    public override void OnInspectorGUI()
    {
        serializedObject.Update();
        EditorGUILayout.PropertyField(XRNodes, true);
        EditorGUILayout.PropertyField(PlayOnAwake);
        EditorGUILayout.PropertyField(Loop);
        EditorGUILayout.PropertyField(Haptic, true);

        AdvancedSettings = EditorGUILayout.Foldout(AdvancedSettings, "Advanced Settings");
        if (AdvancedSettings)
        {
            EditorGUI.indentLevel++;

            EditorGUILayout.PropertyField(SyncAudioSource);

            EditorGUI.indentLevel--;
        }
        serializedObject.ApplyModifiedProperties();
    }
}
#endif
You’ll want to make sure to store this in the Editor directory of your project to make sure it takes effect. Unity has a great tutorial on custom editors here, so if this is something that interests you we highly recommend going over this.