Gerald McAlister | February 5, 2020 | Dev Diary


Gerald McAlister | February 5, 2020 | Dev Diary
Setting up an augmented or virtual reality project in Unity has gotten much easier over the past few years. It used to be that you would need many special plugins from various companies to even interface with a VR or AR headset, simply due to how new the technology was. These days however, you can get started using Unity’s VR and AR (XR) plugins without ever downloading another asset. Finding a tutorial on how to do this quickly can be quite a pain however, so we figured that this would be a great opportunity to go over how to quickly setup an XR project in Unity! We’re going to specifically target how to do so for virtual reality headsets with 6 degrees of freedom (6-dof), as well as with tracked controllers; however, much of this will also apply to anyone looking to do this with an AR headset like the Magic Leap One as well!
It is important to note that as of this post, we will not have compatibility with OpenVR. See this post from Unity for more information. When this is fixed in the future, we will work to make sure we update this!
Before we begin, we need to actually go through and install the latest version of Unity. A lot of people still seem to download the Unity installer directly, but we don’t actually recommend doing that anymore. Instead, we recommend downloading Unity Hub instead. Unity Hub allows you to manage multiple installations of Unity, which is great when you may need to install a newer version later on.
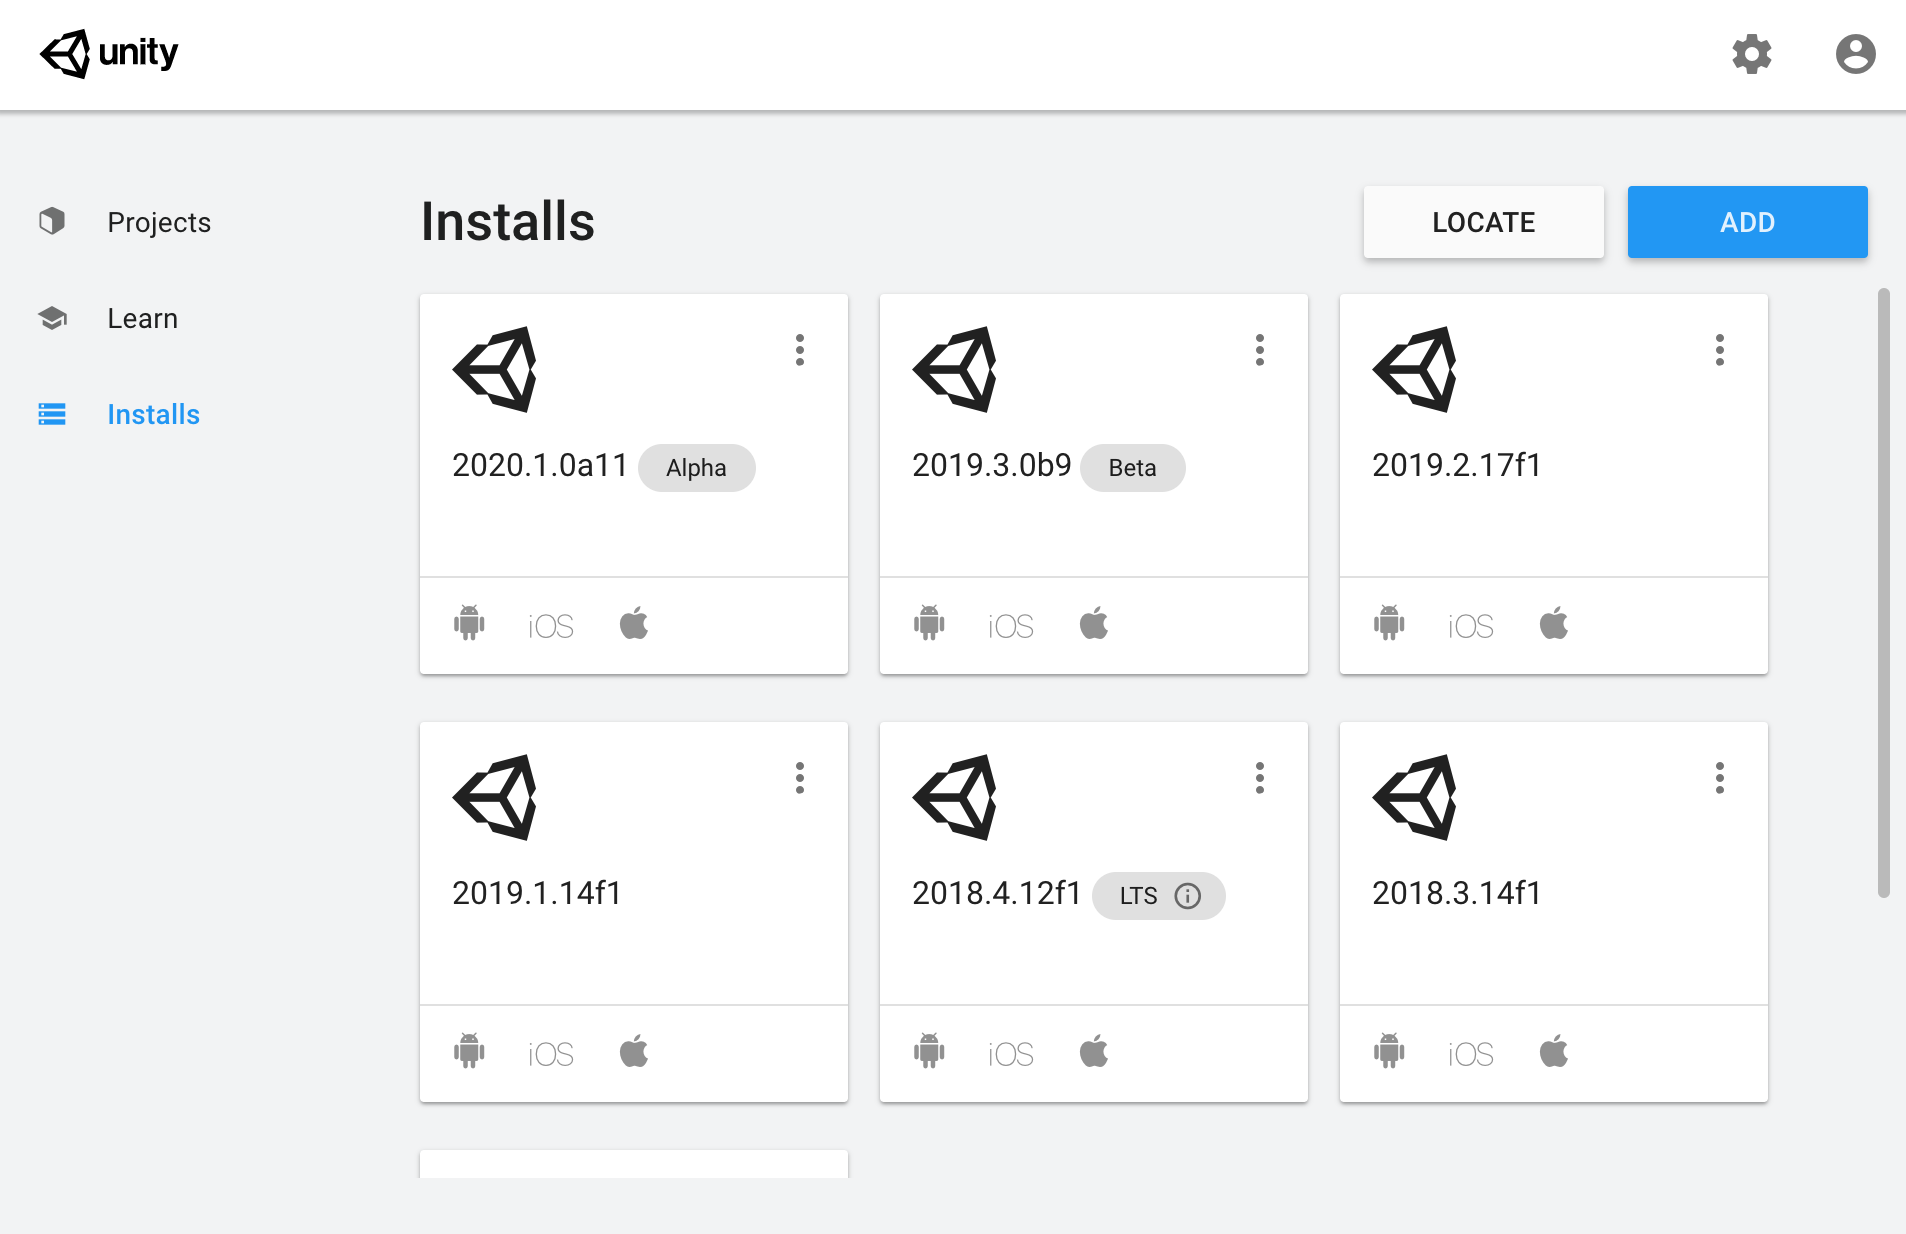 Unity Hub is one of the best tools you can have. It makes dealing with multiple Unity versions a breeze!
Once you’ve installed Unity Hub, go ahead and install the latest version of Unity 2019.3. If you plan to target standalone devices like the Oculus Quest, you’ll want to make sure you include the Android build tools, like seen in the photo below:
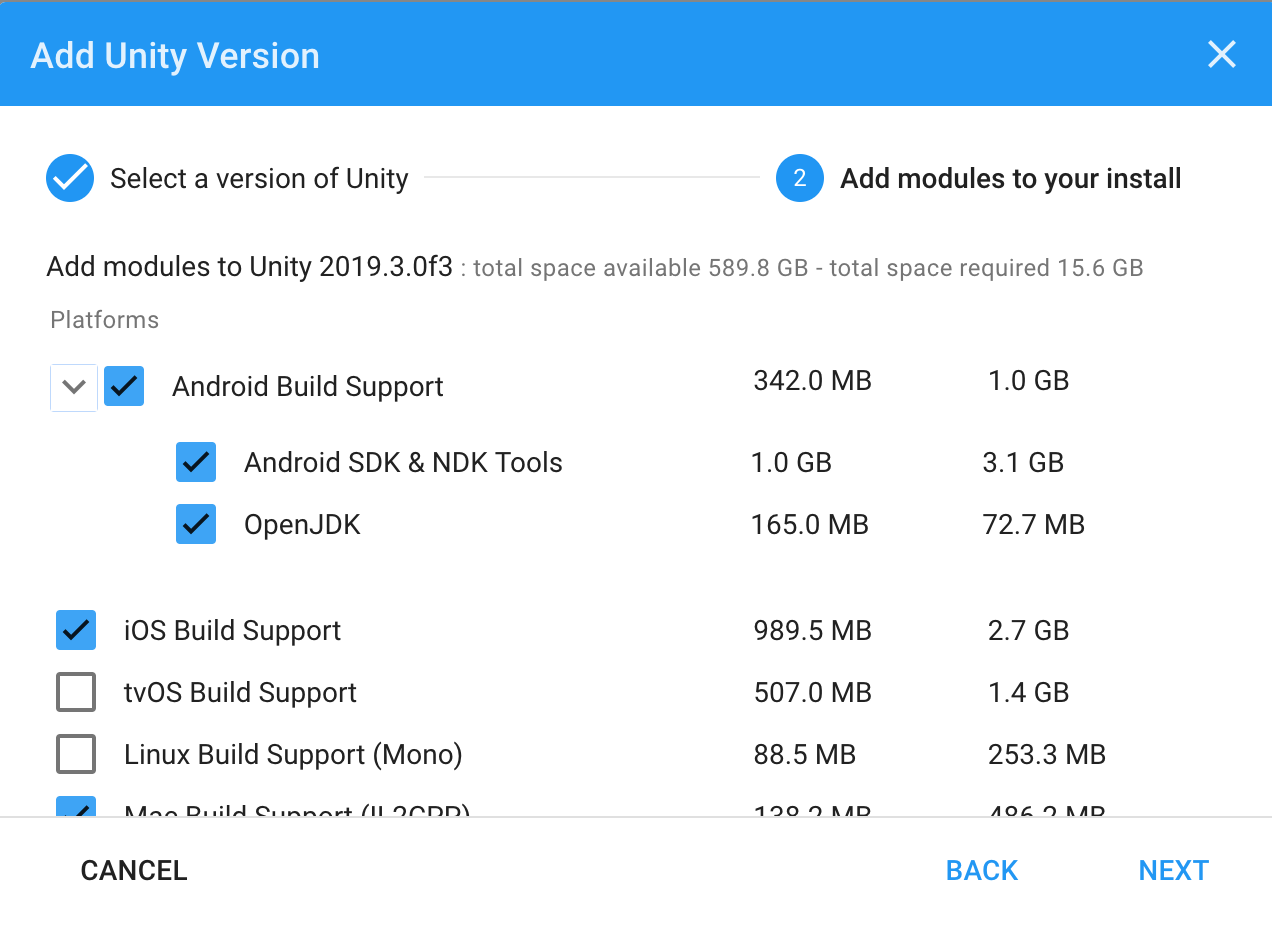 Make sure you have checked all the right boxes!
Why are we using 2019.3? Unity 2020 isn’t quite ready for stable use, while older versions lack some of the full integrations we want to make use of. While it is possible to make a game without the latest tools, we strongly recommend going this route, since it will provide you with better compatibility going forward. With this version of Unity installed, we’re ready to go ahead and create our first project!
To start, you’ll want to go ahead click the “New” button on the projects tab in Unity Hub. This should open a window like this:
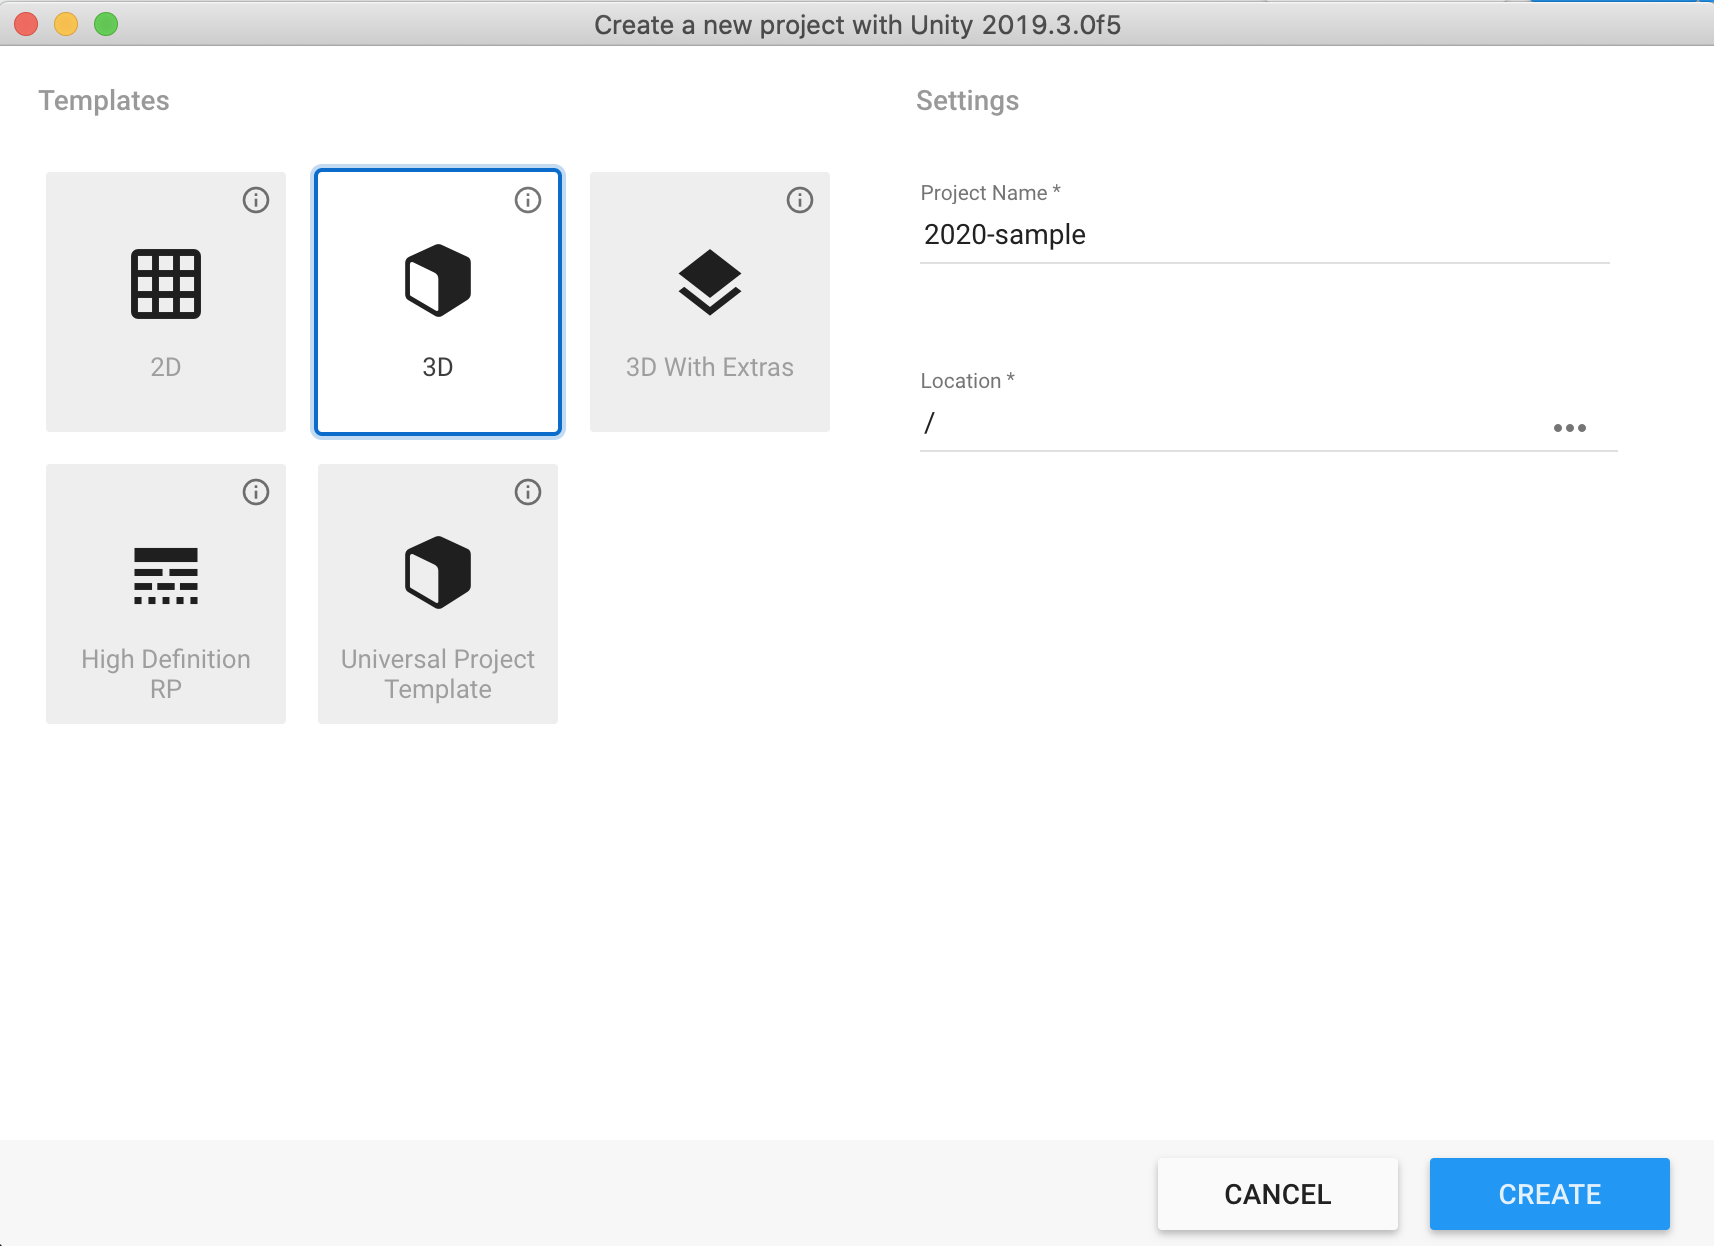
Choose your project location and project name, then click “Create”. Make sure that at the top you see you are using Unity 2019.3 if you have multiple versions of Unity installed. Once the project is created, you’ll be greeted with a very empty scene. Before we start putting anything into the scene, let’s go ahead and update some settings to better work with virtual reality. Open up the Project Settings panel (Edit -> Project Settings…) and click on the XR Plugin Management tab. On this panel, click the “Install XR Plugin Management” button, and Unity will install the necessary packages. You’ll be presented with a new page giving you a new warning message:
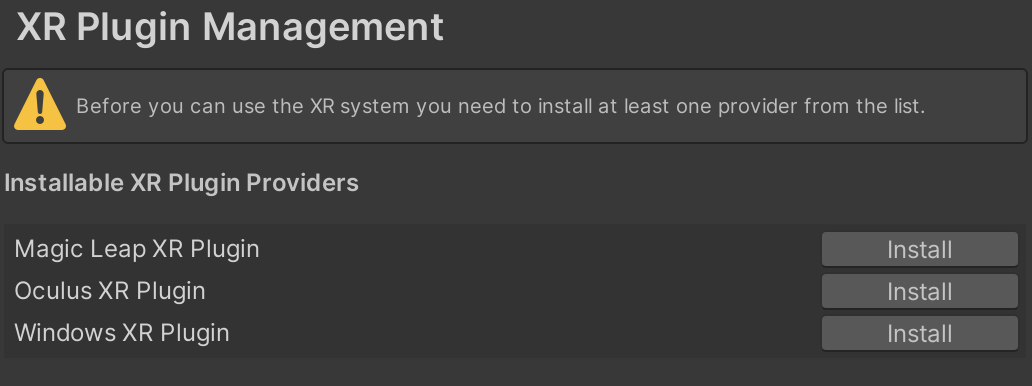
Currently, OpenVR support isn’t available from Unity for this setup, meaning we only need to install the Oculus XR Plugin for now. Eventually, when Valve releases their new plugin, you can come back here and install it to use this with SteamVR. Upon doing this, you’ll be presented with a new warning:
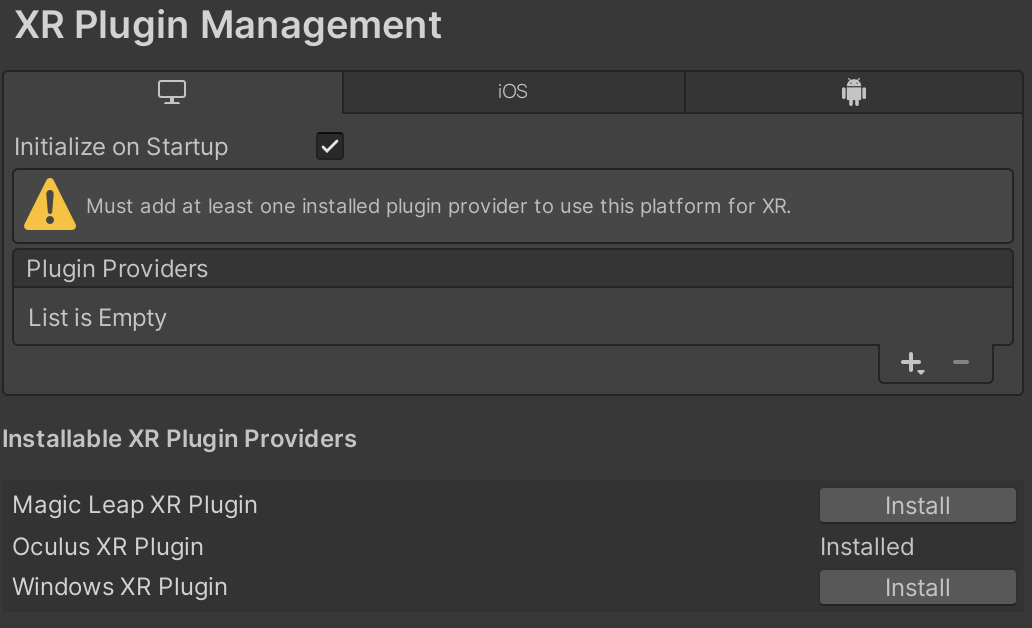
To fix this, click the plus button to add a new Plugin Provider and select the Oculus Loader. If you plan to run this on the Oculus Quest, you’ll need to similarly add this under the Android tab. Additionally, if you want to support Windows Mixed Reality Headsets, make sure you install the Windows XR Plugin, and additionally add its loader as well.
The final step to finish configuring everything is to create our settings for the project. Under the XR Plugin Management tab there should now be a sub-tab that says “Oculus”. Click on this, and on the new page click the “Create” button. This will create the default settings for deploying to Oculus’ platform. Similarly, there is a “Windows Mixed Reality” tab, but this should already be configured. If it’s not, create it as well.
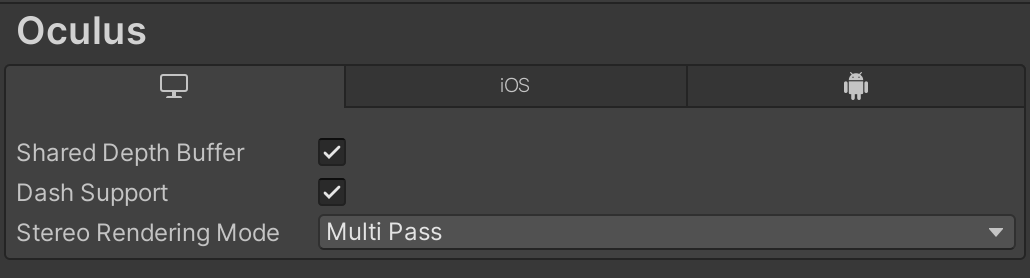 The default settings for Windows
One thing you might be wondering is “What about the Input Helpers tab?” The Input Helpers are part of Unity’s legacy XR systems. We are actually going to ignore those, as they are not necessary to build a virtual reality application, and will go away later on.
Our default scene is very empty, with just a camera and a light. This will make it very difficult for us to tell whether or not our head is moving in virtual reality. Let’s add a few simple things to get started. First, add just a simple plane (GameObject -> 3D Object -> Plane). The default plane object should be positioned at (0, 0, 0) with a scale of (1, 1, 1), which is fine for our tests. Next, let’s create a simple 3D cube (GameObject -> 3D Object -> Cube), positioning it to (0, 0.5, 2). This will place it in front of the player, allowing them to look around it. Finally, set the player’s camera to position (0, 0, 0), that way it’s in the floor. We’ll offset its height using the position of the player’s headset in the future.
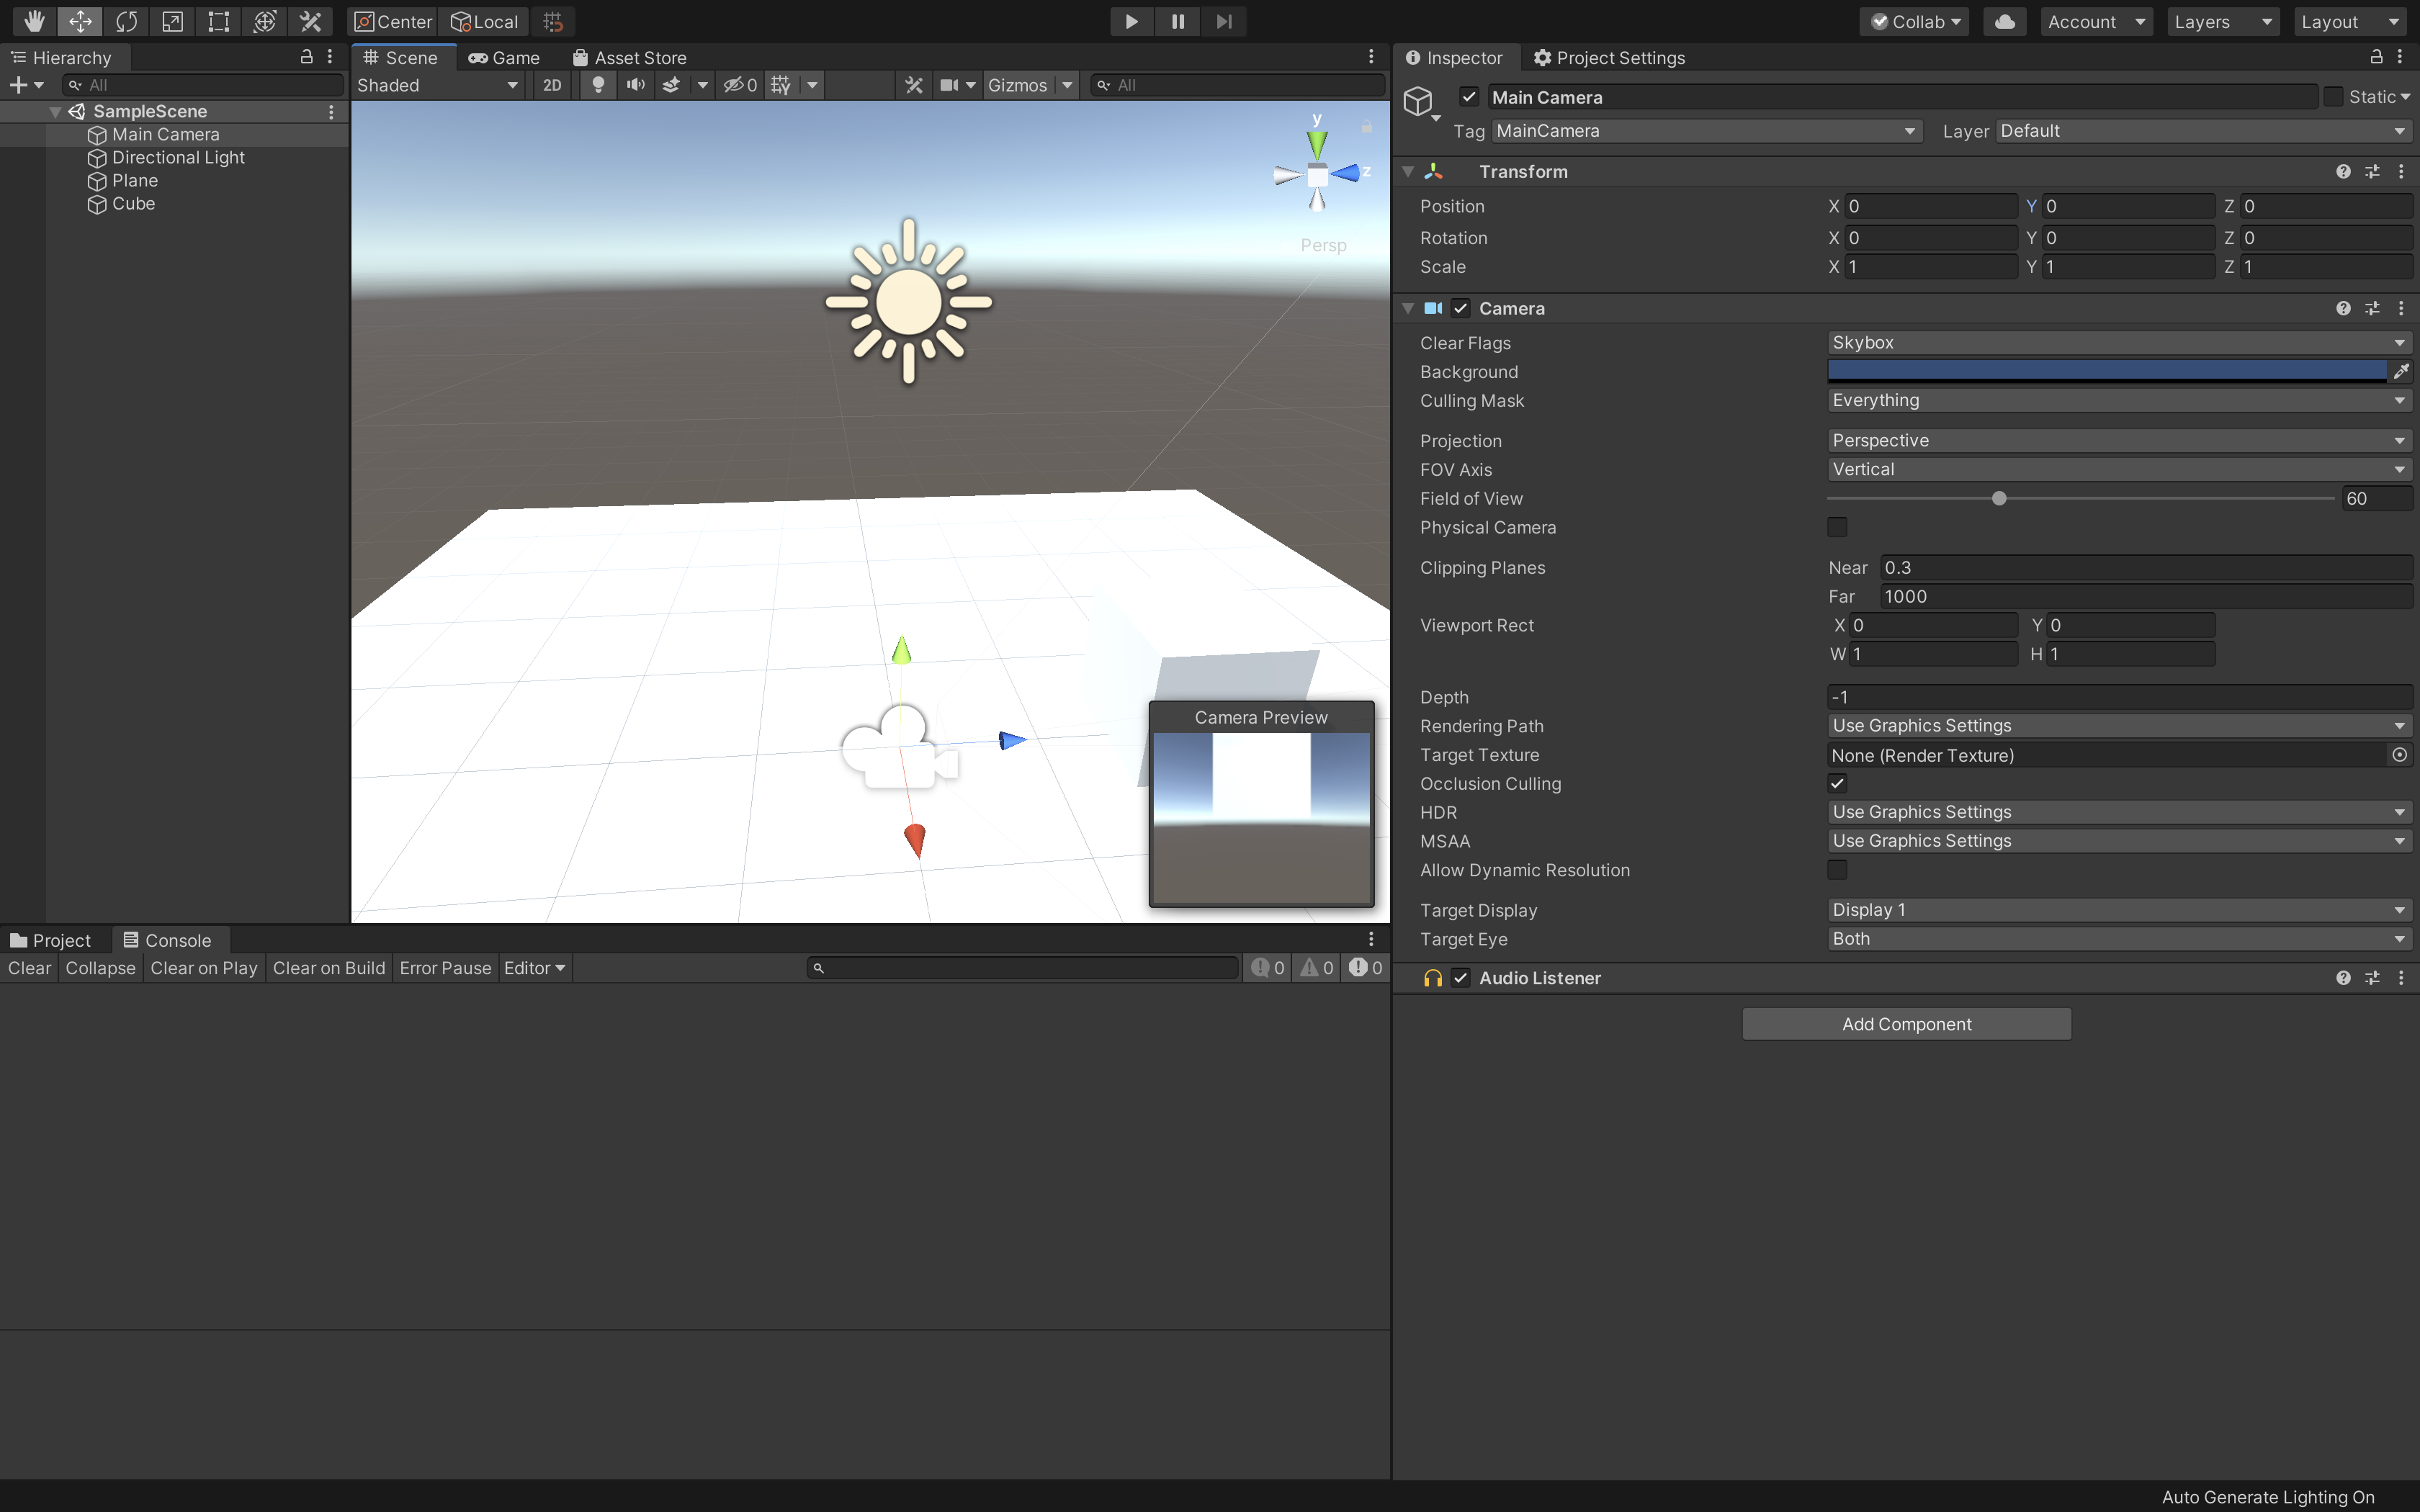 The final setup of our scene for now.
If you run this app right now, you’ll notice that it does not use the headsets orientation, nor does it have your hands visible. This is expected! As mentioned in the previous section, we haven’t included Unity’s Legacy XR systems, meaning that Unity doesn’t know to get the positions of everything. Luckily, we can fix this very easily with a simple script! Go ahead and create a new script called XRPlayer, and add the following code:
using System.Collections.Generic;
using UnityEngine;
using UnityEngine.XR;

public class XRPlayer : MonoBehaviour
{
    public GameObject Head;

    private List<XRNodeState> mNodeStates = new List<XRNodeState>();
    private Vector3 mHeadPos;
    private Quaternion mHeadRot;

    private void Start()
    {
        List<XRInputSubsystem> subsystems = new List<XRInputSubsystem>();
        SubsystemManager.GetInstances<XRInputSubsystem>(subsystems);
        for (int i = 0; i < subsystems.Count; i++)
        {
            subsystems[i].TrySetTrackingOriginMode(TrackingOriginModeFlags.Floor);
        }
    }

    private void Update()
    {
        InputTracking.GetNodeStates(mNodeStates);

        foreach (XRNodeState nodeState in mNodeStates)
        {
            switch (nodeState.nodeType)
            {
                case XRNode.Head:
                    nodeState.TryGetPosition(out mHeadPos);
                    nodeState.TryGetRotation(out mHeadRot);
                    break;
            }
        }
        Head.transform.position = mHeadPos;
        Head.transform.rotation = mHeadRot.normalized;
    }
}
This code is pretty straightforward: Each frame we get the tracking state of all the XRNodes, which we then iterate through and find the node representing the player’s head. We then assign our position and rotation to our Head GameObject, and we’re done! Let’s go ahead and actually put this script to use. In your scene, create a new empty GameObject (GameObject -> Create Empty) naming it “Player”, and drag the “Main Camera” object to be a child of it. On this new “Player” GameObject, add the XRPlayer script we just created, and set the “Head” object to the “Main Camera”.
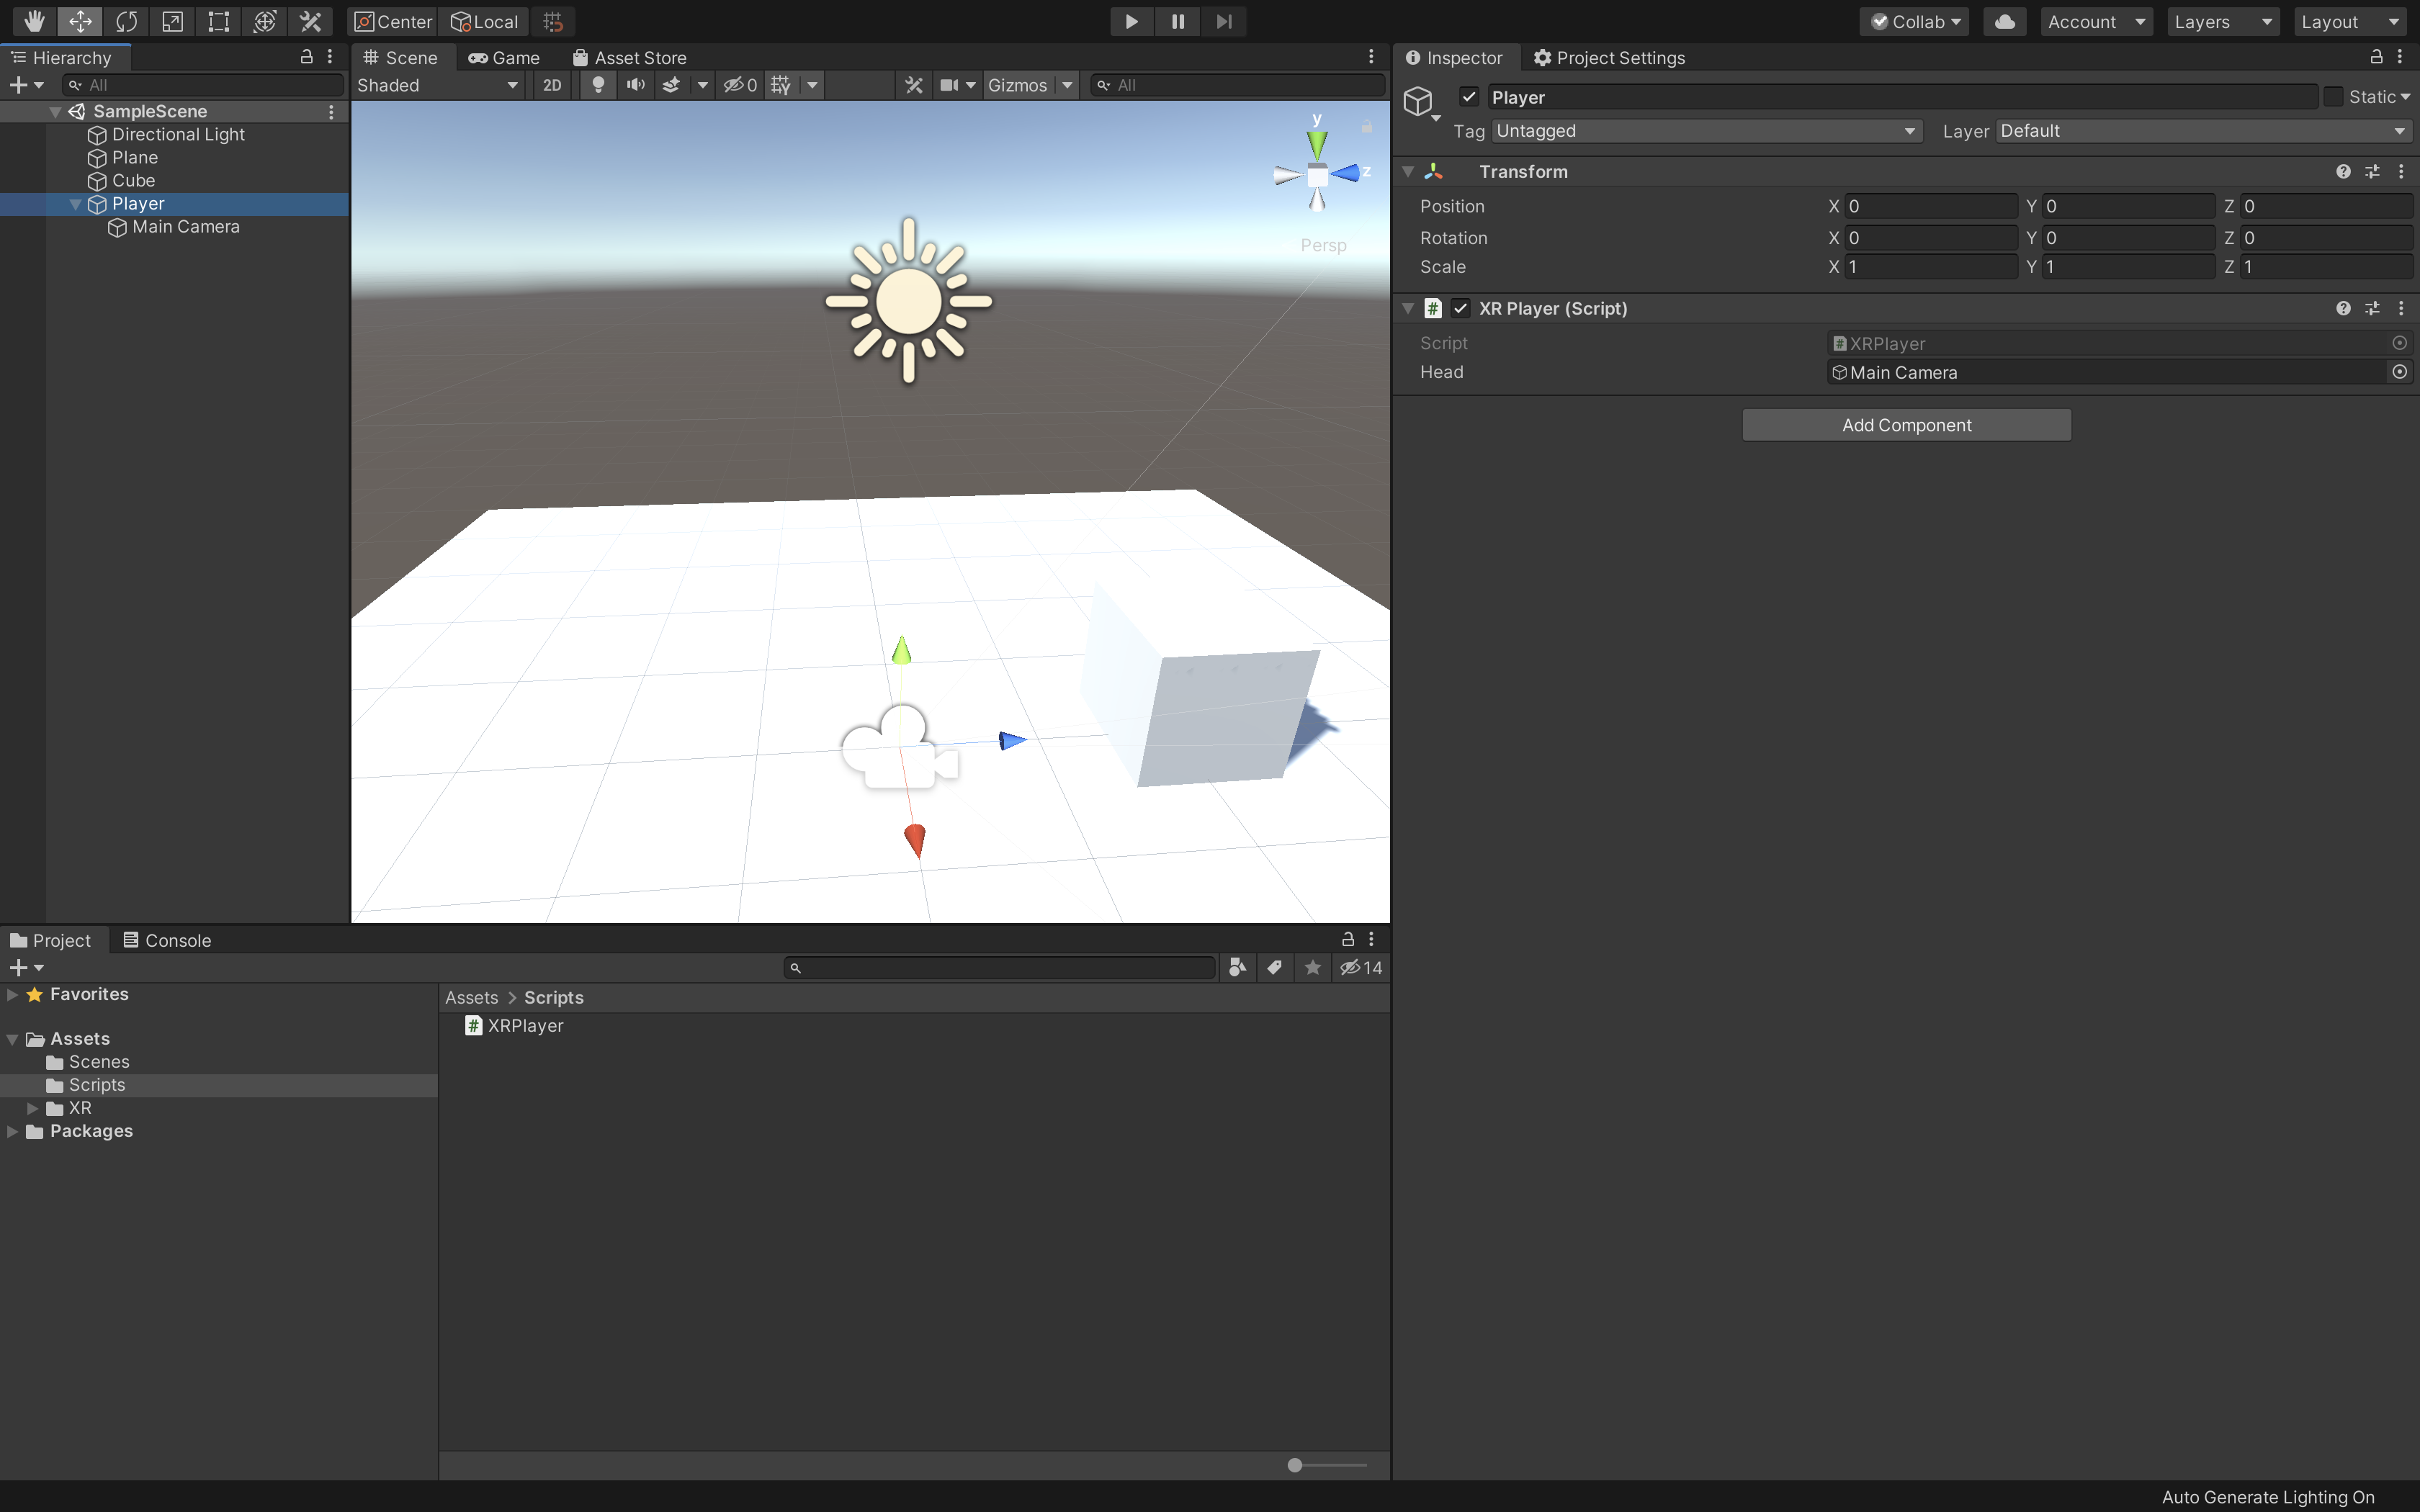 This is how your player’s configuration should look.
At this point, you can now run this demo, and your head should be able to move and rotate around the scene! You can see a demo video of this below:
While having head-tracking working is great, what really makes virtual reality special these days are having the ability to track the controllers as well. Let’s go ahead and add support for this! Doing so is easy: First, we need to update our script to properly handle two hand objects. Let’s take a look at how we can do that:
using System.Collections.Generic;
using UnityEngine;
using UnityEngine.XR;

public class XRPlayer : MonoBehaviour
{
    public GameObject Head;
    public Rigidbody LeftHand, RightHand;

    private List<XRNodeState> mNodeStates = new List<XRNodeState>();
    private Vector3 mHeadPos, mLeftHandPos, mRightHandPos;
    private Quaternion mHeadRot, mLeftHandRot, mRightHandRot;

    private void Start()
    {
        List<XRInputSubsystem> subsystems = new List<XRInputSubsystem>();
        SubsystemManager.GetInstances<XRInputSubsystem>(subsystems);
        for (int i = 0; i < subsystems.Count; i++)
        {
            subsystems[i].TrySetTrackingOriginMode(TrackingOriginModeFlags.Floor);
        }
    }

    private void Update()
    {
        InputTracking.GetNodeStates(mNodeStates);

        foreach (XRNodeState nodeState in mNodeStates)
        {
            switch (nodeState.nodeType)
            {
                case XRNode.Head:
                    nodeState.TryGetPosition(out mHeadPos);
                    nodeState.TryGetRotation(out mHeadRot);
                    break;
            }
        }
        Head.transform.position = mHeadPos;
        Head.transform.rotation = mHeadRot.normalized;
    }

    // FixedUpdate stays in sync with the physics engine.
    private void FixedUpdate()
    {
        InputTracking.GetNodeStates(mNodeStates);

        foreach (XRNodeState nodeState in mNodeStates)
        {
            switch (nodeState.nodeType)
            {
                case XRNode.LeftHand:
                    nodeState.TryGetPosition(out mLeftHandPos);
                    nodeState.TryGetRotation(out mLeftHandRot);
                    break;
                case XRNode.RightHand:
                    nodeState.TryGetPosition(out mRightHandPos);
                    nodeState.TryGetRotation(out mRightHandRot);
                    break;
            }
        }

        LeftHand.MovePosition(mLeftHandPos);
        LeftHand.MoveRotation(mLeftHandRot.normalized);
        RightHand.MovePosition(mRightHandPos);
        RightHand.MoveRotation(mRightHandRot.normalized);
    }
}
There’s a pretty major difference here with how we track the player’ss hands: Rather than using a GameObject, we are instead manipulating a RigidBody. The reason for this is so that our hands can actually interact with objects in our game world, which requires a RigidBody to be attached to our hands. The rest of the code is pretty much the same, with us updating this in the FixedUpdate method instead being the only other thing of note.
To actually add your hands, add two sphere GameObjects (GameObjects -> 3D Object -> Sphere) to the “Player” GameObject, and set their scale to 0.1 for all values. Add a RigidBody to both as well, and make sure you uncheck “Use Gravity”. We’d also recommend setting the “Interpolate” value to “Interpolate”. Finally, make sure you select each hand in the XRPlayer script on the “Player” GameObject.
 The final settings for your scene with hands!
At this point, you should be able to run the scene and see something like this:
Playing through this scene, you’ll probably notice a few issues. For starters, your hands will likely disappear when they get too close to your face. This has an easy fix: Select the “Main Camera” GameObject in your scene and set the “Clipping Planes” Near value to 0.01. This will make sure that any objects that get close to your face (like your hands often will) do not vanish.
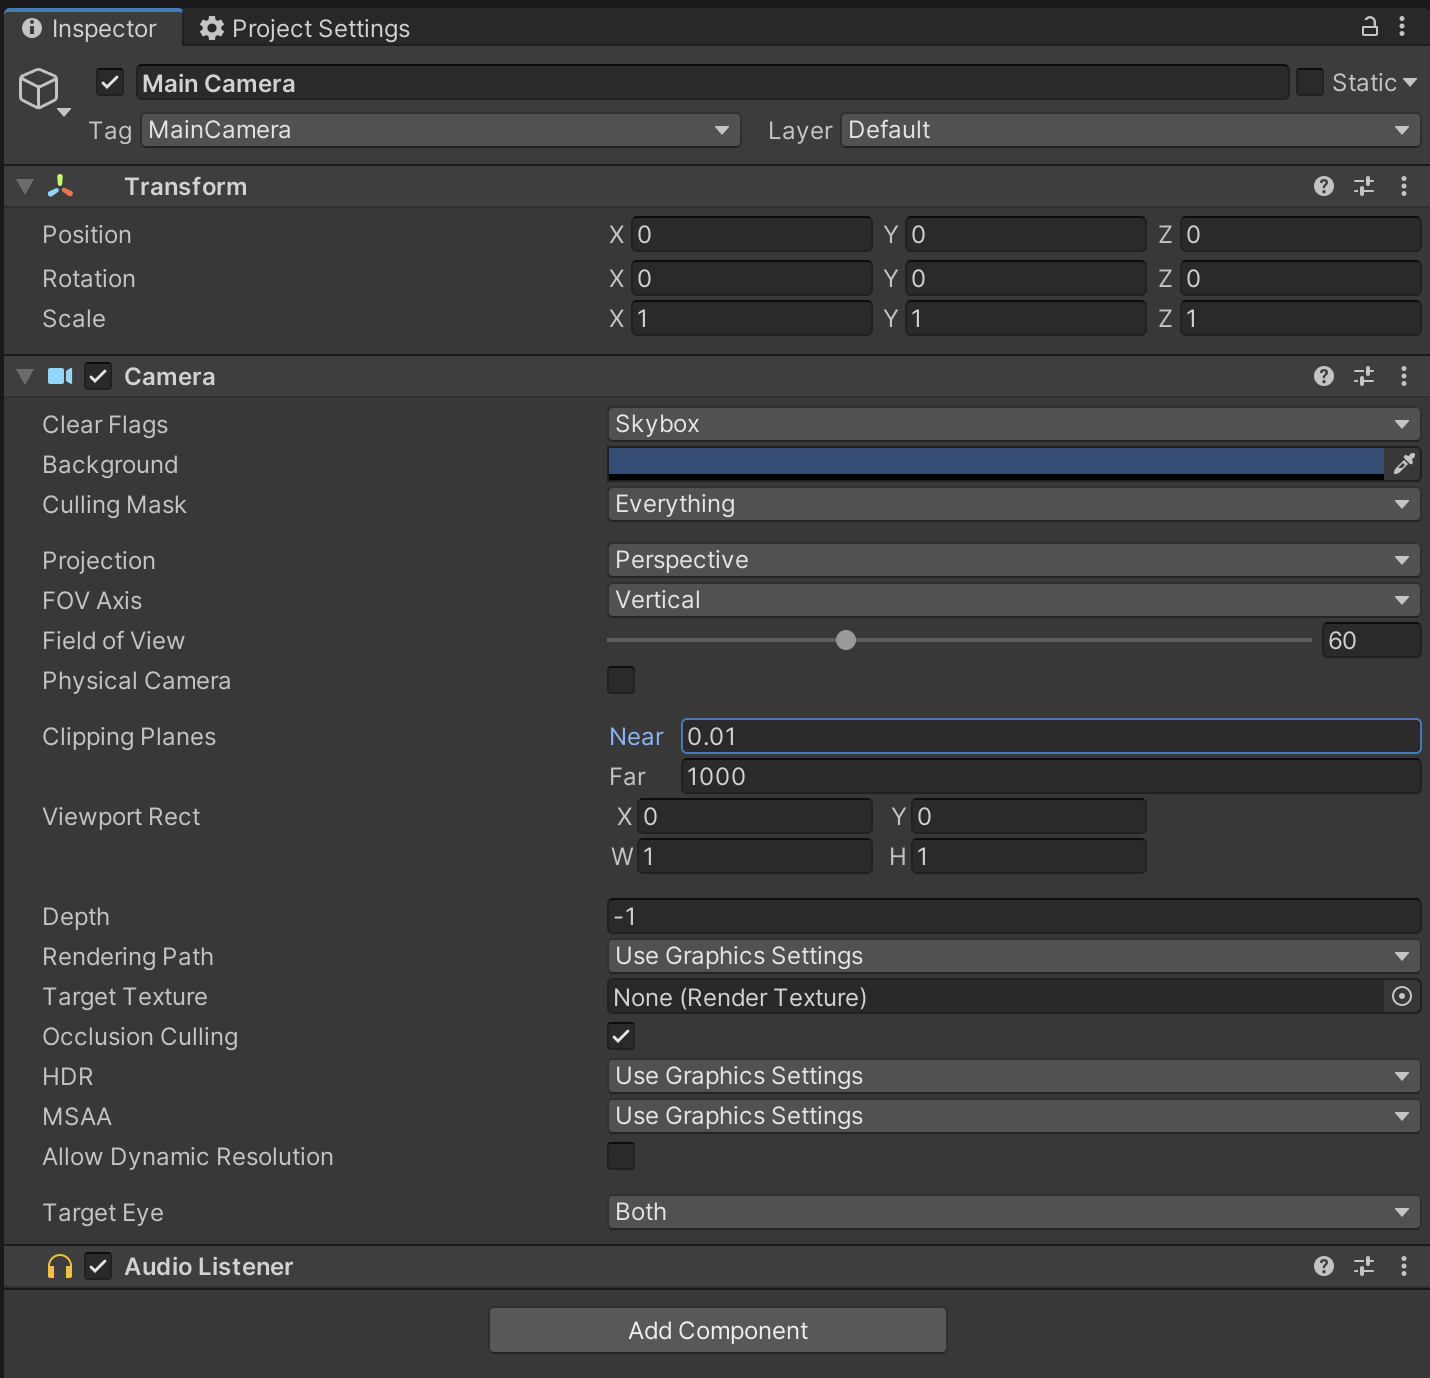 The settings you should use for your camera.
Another issue you might notice is a bit of latency with only your hands moving. It’ll show itself as “jitter” in your hands. This is a bit of a problem for a multitude of reasons, and is hard to solve. The best solution we have found for this has been to ultimately increase the FixedUpdate Timestep (Project Settings… -> Time -> Fixed Timestep) to a value of “1/90”, which should convert to a decimal value of 0.01111111. This seems to fix most of the jitter on all of the Oculus platforms. For SteamVR, you will likely need to increase this to “1/144” (0.006944444) to ensure that you don’t encounter jitter on the Valve Index. The final results should look something like this:
At this point, you now have everything you need to create a virtual reality game or application! On top of this, you have a fairly futured-proofed project structure, since non of this relies on the legacy systems Unity used previously. Some common issues you might see: