Gerald McAlister | February 1, 2017 | Dev Diary


Gerald McAlister | February 1, 2017 | Dev Diary
Today’s story is a tale of optimization woes. Today, we want to address how to fix performance problems that you may run into when developing a video game in Unity for a mobile platform. While many of these tips have been said before, we hope we can share a few for us that we found particularly problematic as they were not well documented. We also want to share some insights into our mitigation of them, and hopefully allow other developers to further optimize their games for mobile platforms. Some of these tips will apply specifically to virtual reality, but many of them also apply to non virtual reality games. With all of that said, let’s dive right in to some of the many optimization issues we’ve run into with our first title!
To begin, we highly recommend reading both of the Oculus Blog posts on optimizing your GearVR game here and here. These contain a variety of tips on how to optimize your game or application, as well as tips for measuring performance in your app or game. We also recommend reading the following post here, though it repeats some of the tips from Oculus’ post. Another great post can be found here, which also talks about some useful assets for further optimizations in your game or app. Many of these were definitely helpful, however there were a few more things that we found to be problematic and not covered with many of these, and as an indie developer it may be beneficial to discuss. With that said, let’s dive right in to some of our more specific situations we encountered.
One of the first issues we ran into was with a button in our elevator. During testing, looking in a specific direction was turning up more latency than normal, but only while you were in the elevator. Looking around, we eventually determined that this was due to our elevator button somehow having gained many additional vertices on it. This ended up being just enough to push our game to miss its target frame, increasing our latency to a rather bad point.
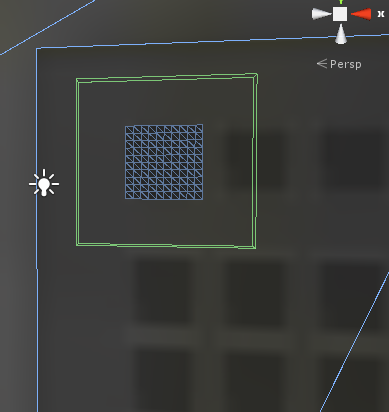
The fix for this was simple obviously (reduce the vertex count), but it made us go back and check some of our other models to ensure that they did not include any more additional vertices than needed. Blender is a free modeling application that includes functionality for this, and many others also support a “cleanup” of vertices. We definitely recommend checking your scenes to ensure that you are being as optimal as possible, and if you see lag only in certain directions, check how much is being drawn.
One of the big things we have wanted to do was reduce the number of loading screens in our game. If we do have loading screens however, we don’t want the player to sit in a dark room waiting for an undetermined amount of time. Thus, we decided to have dynamic loading screens where you can still do stuff while the scene loads. This however resulted in some serious issues, as we ended up being unable to use Unity’s SceneManager.LoadSceneAsynch() method.
This was because while it loads the first 90% of a level fine asynchronously, the last 10% ends up causing a huge hiccup in our framerate. The reason for this is due to how the method works: It begins by loading everything in a scene, including all of the basic layout information, what assets are in the scene, etc. It then however begins to “activate” the scene, which means that each object has its “Awake()” or “Start()” methods called. Because Unity calls all of these in a single callback (not asynchronously), there is a considerable amount of latency if many of your objects have “Start()” and “Awake()” methods. As a result, we could not rely on the method, even with the activation saved for the very end, as we needed these methods for a variety of functions.
Our solution turned out to be very simple, though it requires more work on the developer’s side: Activate each object in a level asynchronously ourselves. We deactivate a majority of the scene by default, and then have a global script to activate each item one by one, keeping track of the progress. This allows us to space everything just right to have an even lower amount of latency, allowing us to maintain another scene while our level loads. We do not have a script at this time, though we may release one in the future should there be enough interest. Another solution to this is to perform the functionality of your “Start()” and “Awake()” methods in another thread or co-routine, however this can be tricky as you need to ensure that you do this for every script you write. As a result, we decided to go with the first option instead.
By default, Unity comes with a wide selection of shaders to choose from. Many of these however end up being very complex, and contain a variety of additional functionality. This comes at a rather large cost, that can sometimes be just enough to cause your game to miss a target frame. Something as simple as rendering just a quad with a texture can quickly take up a large amount of time for processing if your shader is not properly optimized. This is why we were very surprised when we dug around Unity’s default shaders (including the mobile ones) and found that they were causing us some optimization issues by default. This is mainly due to the fact that we are dealing with a virtual reality application, which resulted in a need for further optimizing our shaders.
In the end, we have settled on two basic shaders that we use for the majority of our game: The first one simply uses a solid color on an object, and the other uses a simple texture on an object. Both of these are kept as minimal as possible, so as to reduce the overhead from our shaders as much as possible. They do not contain any information about lighting, as we are working to bake our lighting textures directly into the texture itself. We highly recommend doing this in your game as well, as this will greatly reduce the overhead needed in your game. While Unity abstracts a lot of things, shaders are still essential to 3D game development, and are hard to abstract away.
Many of these tips are pretty straightforward, but we think it’s important to have a collection of these saved somewhere. If you find yourself in a situation where your scene is not performing well, take a look through and see if something could be causing it. When in doubt, try creating a customized version of assets you are using if you haven’t already and see if that improves your performance. Little things can quickly add up in virtual reality, especially since everything generally ends up getting rendered twice. Have questions or additional tips? Ask and share in the comments below, and if you found this post useful, leave a like!